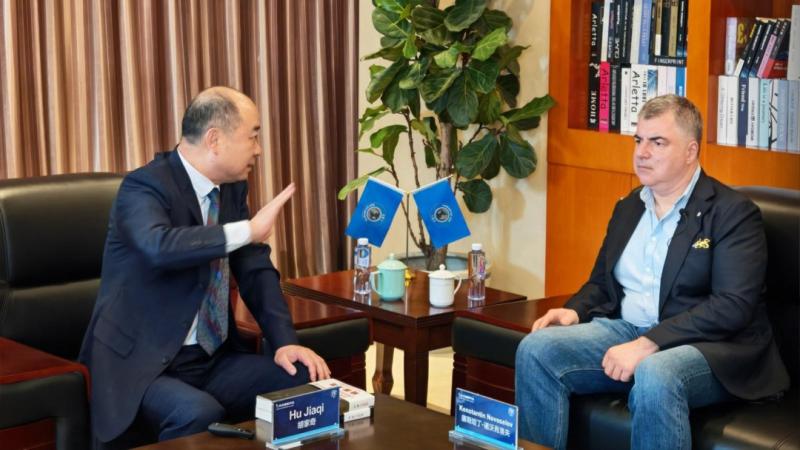
More Autonomous Flights and Bottle Drop

July 7th, 2008 by David

On May 10th we attempted our first bottle drop from 400 feet.  The bottle had an aluminum tab attached to it which was held by small servo at the center of gravity of the UAV.  We took off under manual control and gained altitude, as the UAV flew it’s oval path autonomously, the bottle was released over the field.  The first bottle we dropped was a 500mL Nalgene bottle, which failed miserably (see picture below).

Missouri S&T UAV

With the water bottle attached, the flight characteristics were not affected, although takeoff distance was increased, the autopilot’s ability to control the UAV was not affected noticably.  During these flights the winds were relatively high, ranging from 10 to 15 MPH, which made navigation for the UAV difficult, but the autopilot performed admirably.  Though at times it was blown off the path, it returned quickly to the intended flight path.  Several autonomous test flights were performed in the windy conditions, further demonstrating the robustness of our UAV platform.

Missouri S&T UAV Team - Nalgen Bottle

Three more test flights were performed on May 15th, all of which included water bottle drops with different bottle designs that took into account lessons learned from the first test.  Enclosures were developed for subsequent bottles that allowed them to survive the 400-foot drop.  Data was also gathered about where the bottles landed and at what point they were released.  With this data the theoretical and actual horizontal distance traveled were compared.  After analysis it turned out that the horizontal distance traveled from two of the drops was consistent, this allowed a simple model to be developed for the trajectory of the bottle.  During the final flight, aerial video of the bottle being released was also obtained from the onboard digital camera (see the video below).


These test flights provided valuable data about how the bottle’s trajectory is affected by the wind resistance, as well as about how the UAV platform handles moderate winds.  The next crucial step will be to integrate the onboard computer along with the camera into the aircraft to allow testing of the system as a whole.

Posted in Autopilot, Electronics, Flying | No Comments »

UAV Autopilot Tuning

April 8th, 2008 by David

On Saturday (April 5th) we flew the airplane for the first time with the autopilot since it got the new wing.  But before we went out to the RC airfield we had to physically install the autopilot in the fuselage, which went well.  We then performed all of the flights necessary to tune the autopilot in HIL (Hardware In the Loop) simulation mode.

Missouri S&T UAV on the Ground

Using HIL simulation allowed us to all to get a better of idea of what we had to do once we got out to the airfield.  In the end performing the HIL simulation in the lab saved us a lot of time and allowed me to get more familiar with tuning the PID control loops for the autopilot.  Previously we had not used the PID window in Virtual Cockpit, but after using it in the HIL simulation it proved to be invaluable for properly tuning the autopilot, it allows you to see the actual, desired, and effort of a certain control parameter (i.e. pitch, roll, yaw, altitude, etc.).  Previously we had had issues seeing a change in the behavior from the ground after changing a certain PID gain.

On the first flight soon after takeoff the aircraft became unstable and began to become uncontrollable and began oscillating wildly, fortunately our pilot Kyle was able to get it back on the ground without any damage.  It turns out that our CG was too far aft, but after adjusting the CG we were able to continue with testing.  Using the PID window and the having performed the same process of tuning the autopilot in HIL mode, the first few flights went quickly and we were able to quickly tune the level 1 control loops within two 15-minute flights.  A graph of the autopilot’s roll performance is shown below, ideally the two lines should match, and they are in fact very close.

Missouri S&T UAV Team - Autopilot Roll Performance

We then moved on to the level 2 control loops (i.e. pitch from airspeed, pitch from altitude, airspeed from throttle, etc.).  These were slightly more difficult, and took several passes over the airfield to complete, but we were able to get them tuned to a reasonable level.  The ability of the autopilot to maintain a constant altitude is shown below, there are slight oscillations in the altitude (+/- 3 meters), these are reasonable, but might be improved at a later time with more tuning.

Missouri S&T UAV Team - Altitude Performance

Just as my laptop battery was about to give out we moved on to the final flight of the day.  The purpose of the final flight was to verify that the autopilot is able to navigate accurately and safely.  The first test was simply placing a loiter waypoint above the center of the RC airfield; although there were some oscillations in altitude, the overall performance was quite good (note the 4 m/s wind speed).

Missouri S&T UAV Team - Loiter Performance

The final test was to create an oval over the airfield that the UAV would have to navigate.  The first time around the circuit the UAV did not adhere to the waypoints too strictly, but after adjusting some of the navigation parameters the performance was significantly improved (see image below).  After completing these flights the telemetry was reviewed and we were better able to analyze the performance of the autopilot and its navigation.

Missouri S&T UAV Team - Oval Flight Performance

Overall the testing went well and we were able to tune the autopilot control loops better than we had previously been able to with the old wing, this is most likely due to our use the PID window and the HIL simulation which allowed our time at the airfield to be spent much more efficiently.

And now for some video of the flight and the telemetry from the navigation flights:

Posted in Autopilot, Electronics, Flying, Media | 1 Comment »

Progress Update

March 30th, 2008 by David

Sorry about the lack of updates, there are many new updates coming shortly so bear with us.  The first update being that we completed the new wing and completed the first flight with the new wing and it performed very well even in windy conditions.  Unfortunately there are no pictures of the actual flight but here are some pictures of the new wing on the airplane.  This new wing is significantly stronger allowing us to carry our large payload, it also has less drag allowing us to fly at greater speeds.

UAV New Wing

Although you can’t see from this picture the entire trailing edge consists of the control surfaces for the flaps and the ailerons, we plan on using the flaps during landing to allow us to land slower at slower speeds.

We have also been working on the onboard computer for the airplane, below are some pictures of it and the new enclosure that we had rapid prototyped out of polycarbonate on campus.  The onboard computer is a single-board-computer (SBC) with a 1.8GHz Pentium M processor, 1GB of RAM, and 4GB of flash running Ubuntu Linux.  This computer will handle all of the image acquisition and some or all of the image processing.

 UAV Onboard Computer SBC

Since we have the UAV in flying condition again we will be slowly integrating the all of the electronics into the actual airframe and there should be more frequent updates now that we will be back in the testing/development phase.

Posted in Construction, Electronics, Flying, Wing | No Comments »

Test Rig

January 4th, 2008 by David

I recently started assembling a test rig to integrate all of the electronics that will be going in the UAV. By performing all of this integration on test bench, the final installation and configuration will be performed much faster. This will also allow us do our HIL (Hardware In the Loop) simulation with all of the components connected.

UAV Electronics Test Rig

You may have noticed that there are two large NiHM battery packs, these will soon be replaced by two (11.1V 3200mAh) Lithium Polymer battery packs, saving us about half a pound of weight and significantly increasing our power capacities. Although for bench testing all of the electronics will be powered of off a standard ATX computer power supply. The next step is the get the HIL simulation working with the autopilot and the it’s simulator, this part has been a bit finicky but it should be resolved now.

As a team we have also discussed possible strategies for image acquisition and processing. We had previously planned on simply acquiring VGA resolution video at 30 frames per second, but after reconsidering what altitudes we will be required to fly at to cover the search area in a reasonable time we quickly realized that VGA video would not provide the resolution we need to identify a human target on the ground from an altitude of 400 feet. We have since decided it would be best to use a much higher resolution still camera taking images at set intervals and tagging them with the GPS coordinates and the orientation of the UAV.

Posted in Autopilot, Electronics | 5 Comments »

New Wing Design

December 6th, 2007 by David

Since our crash several months ago we have been developing a new wing specifically designed to meet our requirements for our mission. Since speed is high priority in our mission we have designed a wing that is smaller and more aerodynamic allowing us to fly faster in order to cover the search area in less time. Two of our excellent Aerospace Engineers have been working on the design of our wing, performing various calculations and CFD (Computational Fluid Dynamics) analysis. Unfortunately due to everybody’s busy schedules we have been slightly behind schedule in the construction of the new wing, but we plan to be back in the air by late January or early February. Below are a few images of our current design and a screenshot of our UAV flying in the X-Plane flight simulator.

UAV Wing Design

UAV Flying in X-Plane

We are also currently in the process of evaluating our strategy for acquiring and processing the images, we are working to decide what approach would be best suited and the most efficient for our mission. Our second revision of the power distribution board for the UAV is also nearing completion (see below).

UAV Power Distribution PCB

Posted in Electronics, Team Update | No Comments »

The Crash…

September 21st, 2007 by David

We went out flying a few weeks ago (September 8th) with the intent of tuning the autopilot control loops better, since in their current state they were not tuned well enough for autonomous landing. We headed out to the RC field around 3 and shortly got everything together. We had also installed a camera on the vertical stabilizer to finally get some in flight video. For the most part everything was going smoothly until the third flight.

During the third flight shortly after takeoff we began a descent and then both wings suddenly tore off from the fuselage. It is important to note that this occurred under the manual control of the pilot, it should also be noted that the UAV was carrying more weight than we have had in any other flights. We had also previously suspected that the wings might be too weak to handle the weight, and it turns out they were. After the wings tore off, the airplane was still several hundred feet in the air and it quickly went into a dive and plummeted into an open field, thankfully no cows were harmed in the crash. Below are pictures of the carnage…
UAV Crash

UAV Crash - Internals

As you can see from the pictures above the fuselage is completely ruined, as are the wings, but thankfully all of the electronics and the engine survived. We have already begun to search for a new airframe, currently we have not been able to find an aircraft that is more suited for our purpose so we will most likely be purchasing another Sig Kadet and building our own wings in order to make them much stronger and more efficient (by using a different airfoil).

Here is some in-flight video before the airplane crashed…

Click here to download the high quality video.

Posted in Autopilot, Electronics, Flying | No Comments »

First flight with the autopilot

April 19th, 2007 by David

We had our first flight of the airplane with the autopilot installed last Tuesday (April 17th). We arrived at the RC airfield around 6PM, much to our dismay there was some light rain, which eventually stopped. Setting up the ground station was the first priority, then all of the control surfaces were tested to make sure they were functioning and deflecting the right amount, although for some reason the throttle servo was not moving, after a little bit of tweaking in the Virtual Cockpit, it worked fine. Shortly after the throttle servo was fixed, the autopilot stopped responding, it turned out that the ground connection of the battery to the autopilot had failed, since we did not have a soldering iron handy, the two wires were twisted together and wrapped securely in electrical tape, although as an interesting note, if this wire would have come lose in flight, all control of the aircraft would have been lost.

Autopilot in the UAV

Starting the engine

Abe and Jonathan starting the airplane

The moment of truth came and we fired up the engine and began the to takeoff (on manual control), the airplane was able to takeoff in a relatively short distance and was quickly in the air. The radio link between the autopilot and the ground station was quite strong and the Virtual Cockpit provided us with the airspeed, height above ground, and the attitude of the aircraft. The first order of business was to calibrate the dynamic and static air pressure sensors on the airplane. The next few flights consisted of tuning the control loops with the correct parameters, this was fairly straightforward, but rather time consuming. Once the roll and yaw loops were configured, it was interesting to see how the airplane quickly straightened itself when the pilot attempted to roll it. Although we were not able to finish tuning the control loops since it began getting dark.

The ground station

Overall the first flight with the autopilot was a great success. We plan on flying the airplane again this Sunday, and will hopefully finish tunning the control loops and have our first autonomous flight.  For more pictures you can visit our flickr site.

Takeoff

Posted in Autopilot, Electronics, Flying | No Comments »

Autopilot Installation

April 15th, 2007 by David

This weekend we began installing the Kestrel autopilot in the airplane, which consisted of wiring up all of the servos and GPS, as well as configuring the servos in the Virtual Cockpit software. This took a surprisingly long time, although most of the time was spent on making the wiring harnesses and troubleshooting why the servos were not function properly. Once everything was powered up, the servos didn’t want to move, which it turns out was because I did not use the autopilot’s power rails since I had completely bypassed them and sent only the PWM signal wire from the autopilot to the servos, and powered the servos independent of the autopilot. Once that autopilot’s power rails were hooked up the servos started working, although they were quite jittery and very rough when on manual control, possibly from some kind of interference from the radio or other electronics. Below are some pictures of the autopilot installed in the airplane.

Autopilot in UAV

Kestrel Autopilot

The autopilot

The GPS unit

The GPS unit.

Now that the autopilot is installed, and as long as there is good weather this week, we should be able to have the first few flights with the autopilot. According to the manual, it will only take about four flights to tune the control loops for fully autonomous flight. We will also probably end up purchasing an embedded computer this week for the image processing, which will allow us to start developing the image processing algorithm.

Posted in Autopilot, Electronics | No Comments »

Kestrel Autopilot (First Impressions)

April 10th, 2007 by David

Last week the the Kestrel Autopilot from Procerus arrived, and I have to admit, I was quite surprised by the size of it. It’s literally smaller than a deck of cards (slightly taler but less area). Reading over the documentation was first step in learning how to use this powerful little thing. Thankfully the documentation was quite good, and after 5 minutes of soldering a few wires together, it was ready to be powered on for the first time. The accompanying software was quite straightforward and surprisingly once both the autopilot and ground station unit were powered, they instantly acquired a wireless link, and began feeding data into the Virtual Cockpit software.

One really cool and amusing feature was that there was an artificial horizon with a 3D model of an airplane that rotated in whichever direction the autopilot was oriented. After everything was configured roughly how it should be, I began to setup the HIL (Hardware In the Loop) simulation. This allows the autopilot to fly an airplane in a simulator on the computer, allowing the simulation of an entire flight from takeoff to landing. The HIL simulation was quite easy to setup, and was running within minutes. Of course there were several minor details that were overlooked, due to the fact that I had not read the entire manual yet and did not understand the various modes of the autopilot, so the UAV kept crashing, but eventually after playing around with it, it all worked great.

Overall I was rather impressed with how straightforward and easy it was to start using the autopilot right out of the box. From my experience I’ve rarely had such complicated systems up and running in such a short amount of time. Now the next step is to install the autopilot in the airplane, which is quite a task in itself. Hopefully we will be able to have it installed by the end of this weekend, and maybe perform the first flight with the autopilot this weekend, or sometime next week, weather permitting.

And now for some pictures:

Kestrel Autopilot

The autopilot itself.

Kestrel Autopilot Communications Box

The communications box.

Posted in Autopilot, Electronics | No Comments »

More pictures of the UAV

March 26th, 2007 by David

To see more pictures of our UAV you can visit our flickr site. We will be updating our the flickr site frequently with new pictures of our progress.

We have also just recently purchased the autopilot, which should be coming in within the next week or so. After extensive searching and comparisons of various autopilot solutions, the autopilot we decided to go with is the Kestrel by Procerus Technologies. It is quite the feature packed autopilot and should allow us to get the plane up and flying autonomously rather quickly. And we are still in the process of determining what we will use for our video link back to the ground station, the biggest issue is the range, whatever we decide to use must be able to achieve a maximum range of seven miles (line of sight), and lots of bandwidth would be nice too.

As a note we are still looking for sponsors please contact me (derdos (at) ieee.org) if you might be interested in sponsoring our team.

Posted in Electronics, Media | No Comments »